Polar Alignment
What is Polar Alignment?
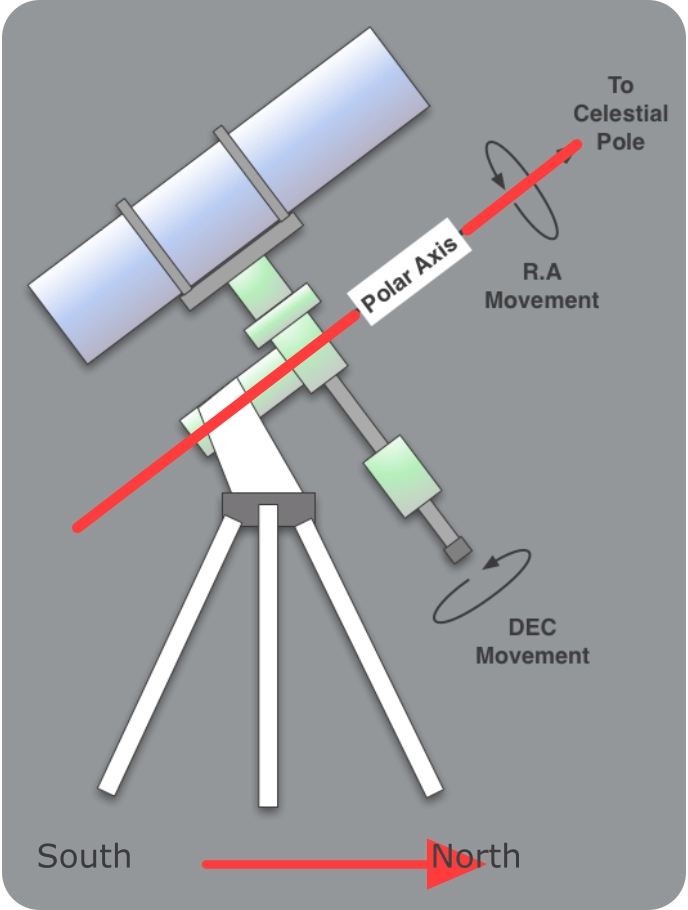
The Earth rotates, this is why the stars appear to move across the sky. What we need to do is to counteract this rotation. An equatorial mount will track an object as it appears to move across the sky, this direction is called Right Ascension. The mount does this by tracking in the opposite direction to the Earth’s spin so as to keep the object in the eyepiece/camera. But, for it to be able to do this it needs to be Polar aligned. Polar alignment is really simple - the Polar Axis needs to be pointing towards one of the Poles.
Polar Align
As I am in the Northern Hemisphere I will be referencing the north (sorry south). In the north we are lucky as we have a star that is very, very near to representing north and this star is called Polaris or the north star. You basically need to line the axis marked in red in the image on the right with the star Polaris, This axis is where the Polar scope is situated. Use a mobile phone app to find Polaris or use the 2 “pointer” stars in the Big Dipper Constellation to find the star. Now follow these 2 simple points to get polar aligned:
1:
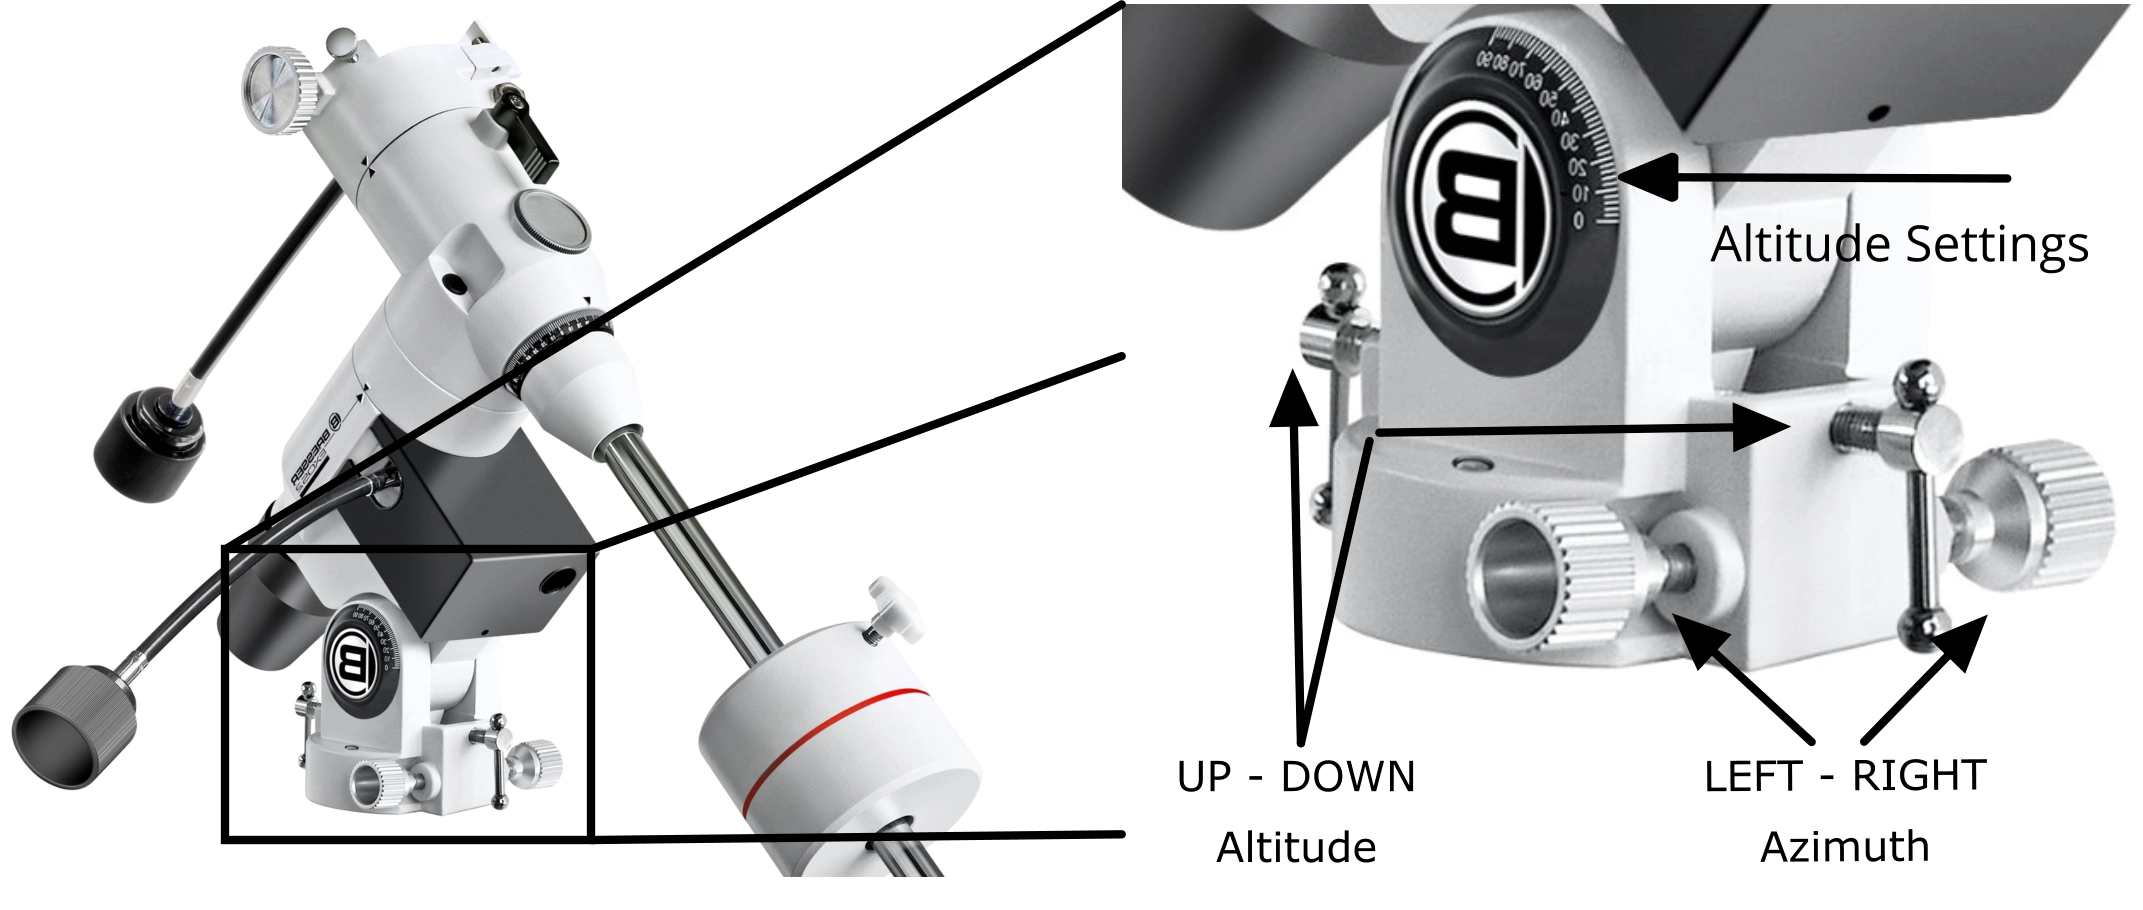
If you have an illuminated polar scope turn on the red light, if not shine a (not too bright) red light across the polar scopes exit hole. With your mount level and facing north - get Polaris in the polar scopes field of view. You do this by moving your mount left or right with the azimuth Knobs, and up and down using the altitude levers. Starting with the altitude levers - rotate them to move the mount up or down. Do this while looking through the Polar scope so that you can see when Polaris comes in to view. This can be made easier by working out what altitude Polaris is from your location with an app and using the altitude setting guide on the mount. For example - the elevation of Polaris is the same as your local latitude. From my home in southern England this is about 51 degrees. So, by raising the elevation of the RA axis to 51 degrees means that the mount is set to the correct altitude. All I then need to do is to move the mount left or right to find Polaris. This is done with the azimuth knobs. You should see just the one star and this should be Polaris.
2:
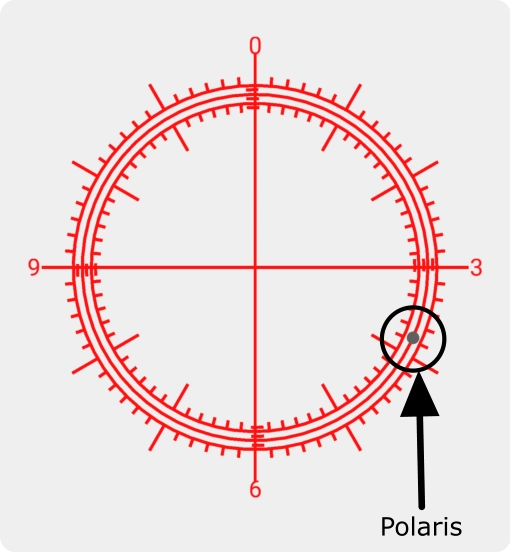
Now you need to place Polaris in the correct position on the Polar clock. Polaris is not situated dead North, instead it rotates in a tiny circle around the true point of North. By placing Polaris on the correct place on the clock means that the mount is accurately aligned. Using an app (above image), find out where Polaris should be on the polar clock for your location & time. You will need to adjust the Azimuth & altitude knobs (above right image) while looking through the polar scope, you will see Polaris moving about as you twiddle the knobs. Place Polaris in the position that the app tells you. When Polaris is at the correct place on the clock you are Polar aligned.
From now on you will not use the altitude or azimuth knobs as all scope movement will be controlled through either the handset and motors on a GoTo or by loosening the RA and DEC knobs and moving the scope manually.