As the weather has been so shocking recently and I haven’t been able to get outside I thought I would pass the time by writing a review of my latest purchase. I bought this mount mid March 2019 and am writing this review as I set up and get it going. This will now be my main imaging mount to support my StarWave 70ED telescope.
The Explore Scientific iEXOS 100 PMC-Eight is a full WiFi enabled and controlled equatorial mount with a huge support for ASCOM compliant software to enable further telescope control through independent software. The mount can be controlled via its own WiFi signal through either Android/ios tablets or via a Windows tablet/laptop/PC again through WiFi or via a wired connection. Just download or install the ExploreStars Application/Software and connect to the mount, perform a 2 or 3 star alignment and your off, that simple. So, here follows my unpacking, setting up, first use and guiding/imaging review;
****UPDATE 13/11/2021****
A hell of a lot has happened since my last update. I had gotten into narrowband Hydrogen Alpha imaging at the end of 2019 and I have more recently purchased a new mono dedicated astro-camera and a set of filters to allow me to create images in the "Hubble Palette".
All of this has been done on the iEXOS-100 PMC-Eight mount and I have also added a mini PC and a Raspberry Pi so that I have a choice of how to remotely control the whole setup. A tutorial for setting this up is
here.
All the pictures in the
Narrowband Gallery section of the website were taken on the iEXOS-100 PMC-eight through my Hydrogen Alpha 7nm filter with single guided exposures between 10 and 15 minutes each!!! So these images are a testiment to how well this "beginners" mount can and does perform.
My most recent purchase is a set of filters that will allow me to create images in the Hubble Palette. These are Suplher-2, Hydrogen-Alpha and Oxygen-3. I have'nt managed to take any exposures with these yet due to the shocking amount of cloud cover here in England at the moment.
****UPDATE 17/03/2019****
I have now managed to get out and test the mount on location. A group of us went to one of our dark sky sites and it was still rather windy. I wasn’t holding out much hope for the tripod being stable enough but I ploughed on through the setting up and alignment process. I connected without issues using the WiFi on the laptop. Once aligned, I slewed to a few targets to make sure that the alignment was working ok, which it was, I then went to my imaging target for the session which was the Whirlpool Galaxy M51. I then attached the guide scope & camera and proceeded to set it up as per normal. BackYardEOS was set up for DSLR control and I was ready to take my first sub. I thought I would throw the mount in to the deep end and go for a 240 second (4 minutes) exposure.
As mentioned, there was a significant breeze and I was expecting to see trailing in my first guided sub but to my delight (and relief) the stars where pin-point sharp, I took another just to make sure that it wasn’t a fluke and again that came out fine. I set it up to take a further 10 subs and went off to take a look through the other telescopes that were set up and to help a fellow member with there new set-up.
Once the imaging run was complete I played around with the mount by slewing to various other targets and generally enjoying myself.
Once home I Stacked the 12 subs and did a quick crappy process in PhotoShop. Here is the resulting image and as you can see, the guiding and tracking has worked an absolute treat.
I am very impressed with this set up and I will recommend it to both beginners and seasoned astronomers.
****ORIGINAL WRITE-UP****
Even though I have been using my EQ3-2 with the enhanced guide-able motors since November and it has served me flawlessly. But, without the GoTo capabilities I needed something that would allow me the capability to spend more time imaging my targets than it took me to find the little buggers. Usually I am fairly good at sniffing out a bargain but on this occasion the iEXOS-100 PMC-Eight mount was suggested to me while out at a dark sky site. I decided to sell my current set-up to fund this new mount, and after a few issues with a certain supplier, I managed to get one on next day delivery from another supplier called the Wide-screen Centre. So, yesterday I was itching to get home and un-box the mount, I was also double lucky due to it being a clear night albeit blowing a hoolie, so that meant a visual sesh.
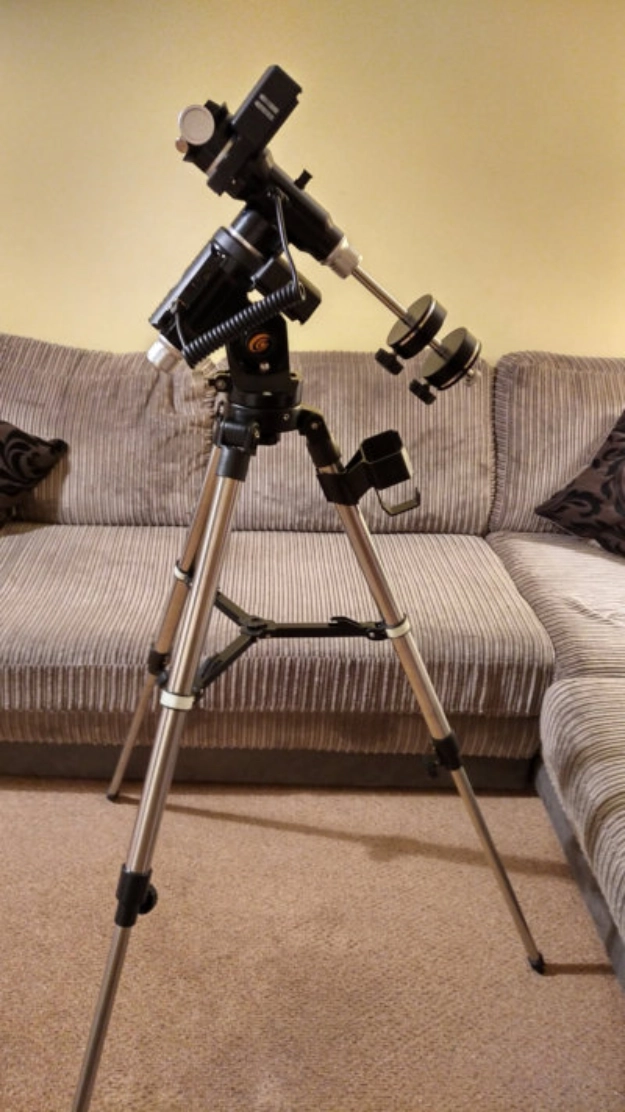
Keeping in mind this is priced as a budget mount I was surprised at how sturdy the tripod is. It's not the best out there but the fact that you get a tripod with it at all is an additional bonus.
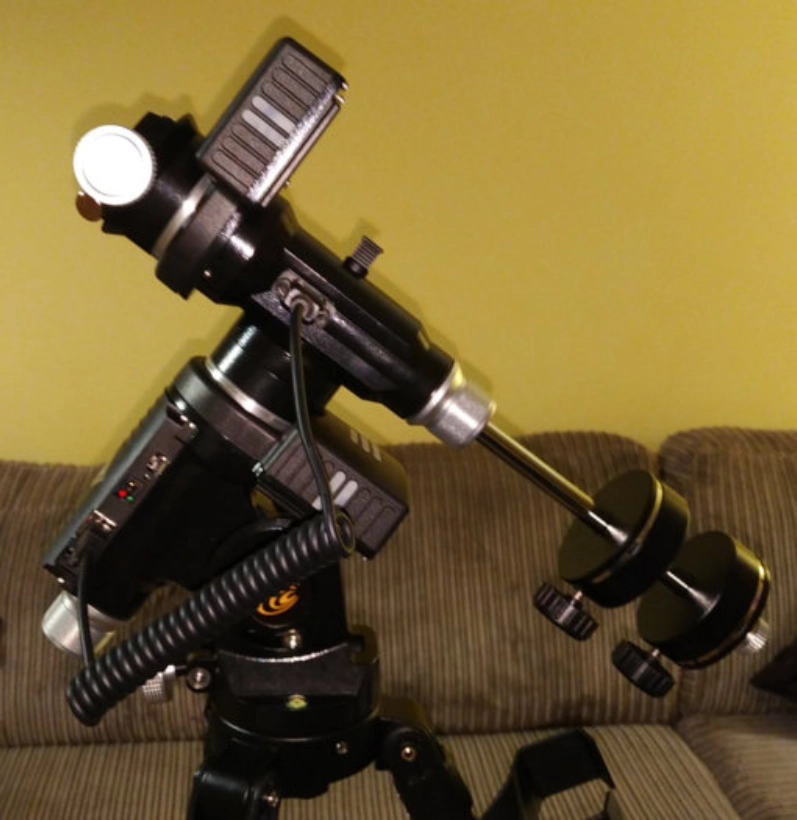
Next up is the mount head itself. It was actually a lot bigger than I thought it would be but it's well made and feels very sturdy. It's an EQ head with the housing for the motors and the on-board computer being plastic, but both materials are made well and it looks and feels great for a budget mount. The RA & DEC clutches are in a weird place, the RA being situated where the polar scope usually is and the DEC being where you screw the counterweight bar. I was a bit dubious about this, but having played with it last night I found it so much easier that turning the clutch levers that come on most mounts. The movement was smooth and the clutches "caught" without having to over tighten. The only downfall is the lack of a polar scope. All there is, is a tiny "polar hole" that allows you to position Polaris. So there is no ability to accurately polar align but this really becomes irrelevant as the mount will be aligned with either a 2 or 3 star alignment process and if you are guiding not being accurately polar aligned isn't too much of an arse-ache as the software will keep any target centred as long as you are roughly aligned. The hole is tiny and equates to about the size of the polar clock seen through a polar scope so TBH you won't be too far out either way. So by this point, the time it's taken for me to climax while opening the box, unpack the gear, set up and roughly polar align is about 10 minutes. So good, so far. Now for the controlling of the mount.
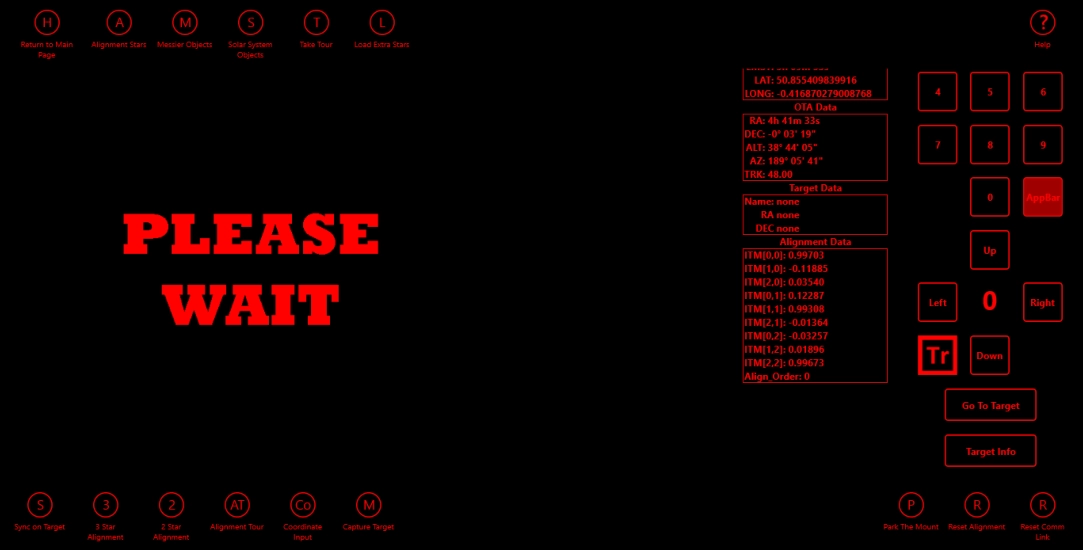
Being a full go to you would expect a hand controller. Even though there is talk of one in the future, as of yet it can be controlled through the ExploreStars app via an Android tablet, iPad or your laptop/PC. Connections with tablets are via WiFi only but if using a laptop/PC you can connect both wireless or by USB cable. Unlike other manufacturers who want you to buy a specialist cable to connect to a PC, this cabled connection is via the same cable as you use for your camera, a type C I believe, which everyone on the planet has in a cupboard somewhere. I chose to connect my laptop wireless. My laptop found the signal instantly and after entering the password I was up and running. I did a 2 star align on the stars that it gave me and I was done. I then slewed over to the Orion Neb and there it was, slap bang in the middle of the eyepiece. Very happy.
The application is a bit basic but then again it is a budget mount. But saying that for all of the Messier and Solar System targets there are detailed descriptions along with images which is a lovely touch. The search feature gives you all other items like stars, NGC numbers etc....